

Today my lovely readers, for the Ooh La La Pin-Up Sew-Along we're going to attach our bra back closures.
 |
| The pattern we're using... |
There are many closures you can attach to a bra back. Most of the pre-1960's lingerie patterns I've worked with call for either a buttonhole closure or hooks and eyes. I'm not a particular fan of either of these because they're not the easiest to close when you have a bad shoulder like I do.
If you're interested in making a button loop closure like the one below, you can see how I did it for the Pauline bra sew-along here.
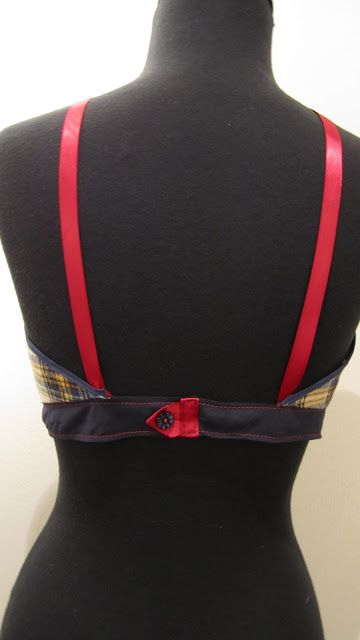
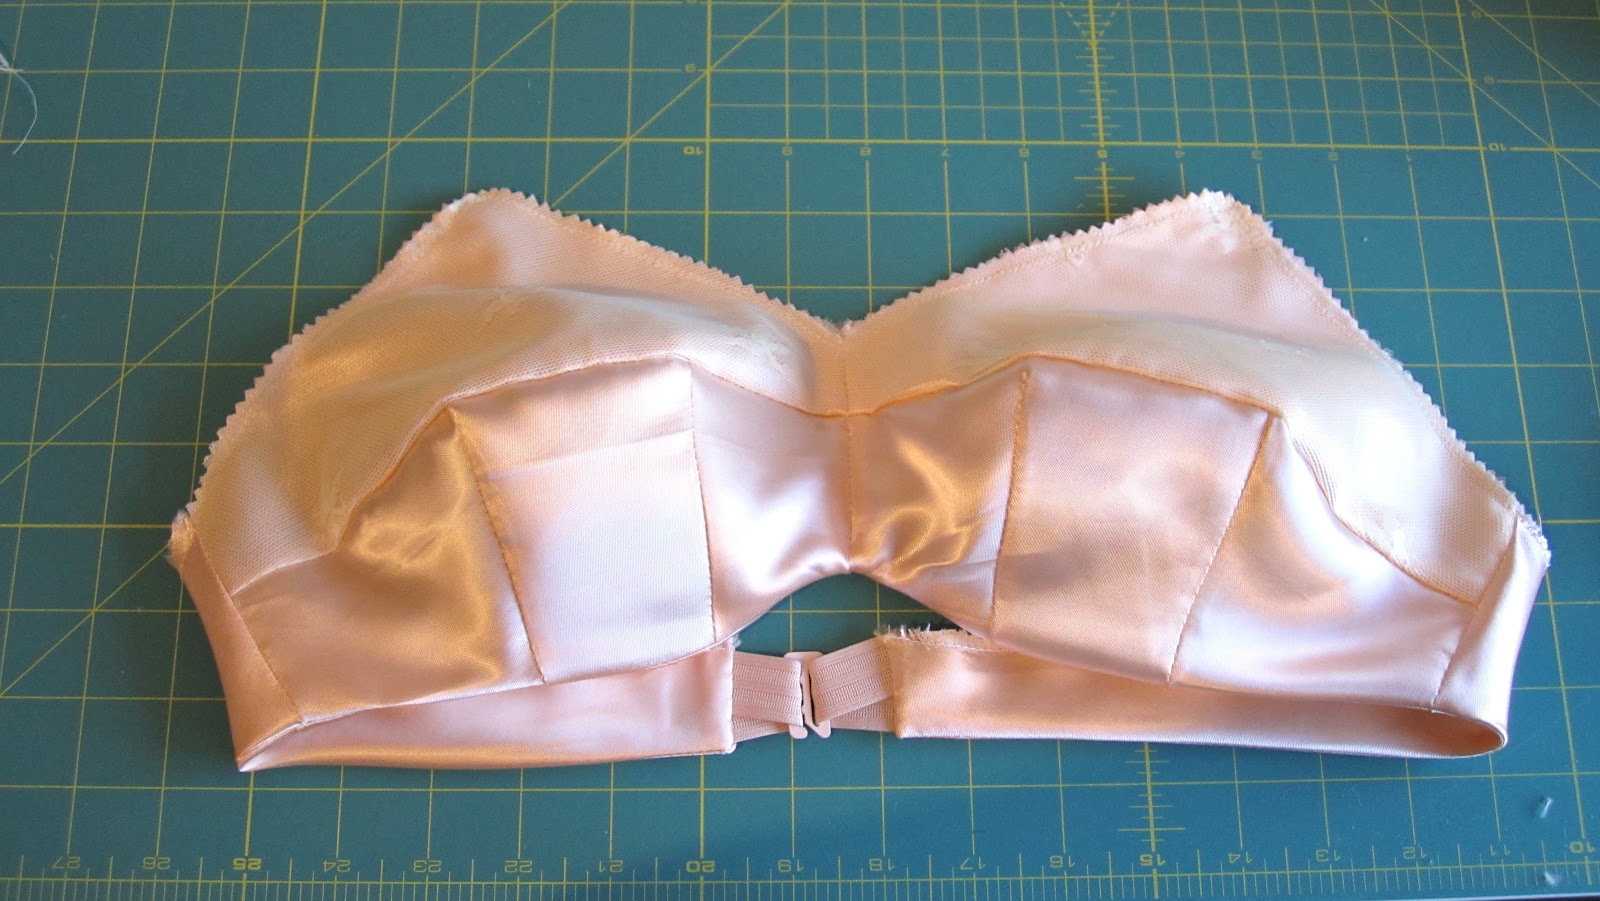
I chose this time to use a wonderful vintage French bra back closure I found online.

I'm so glad I did! This closure turned out to be easy to sew, comfortable, and added that little unique twist that makes sewing your own lingerie really rewarding. These closures were mostly popular on French bras in the 1950's. I have a wonderful vintage French strapless bra from the era with the same closure (more on that later).

As I mentioned in the last post, if you'd like a nice, plush elastic reproduction of this bra back closure you can find them in my etsy shop.
But let's get started, shall we?
If you're using a purchased bra back closure with adjustable hooks and eyes, this principle is essentially the same.
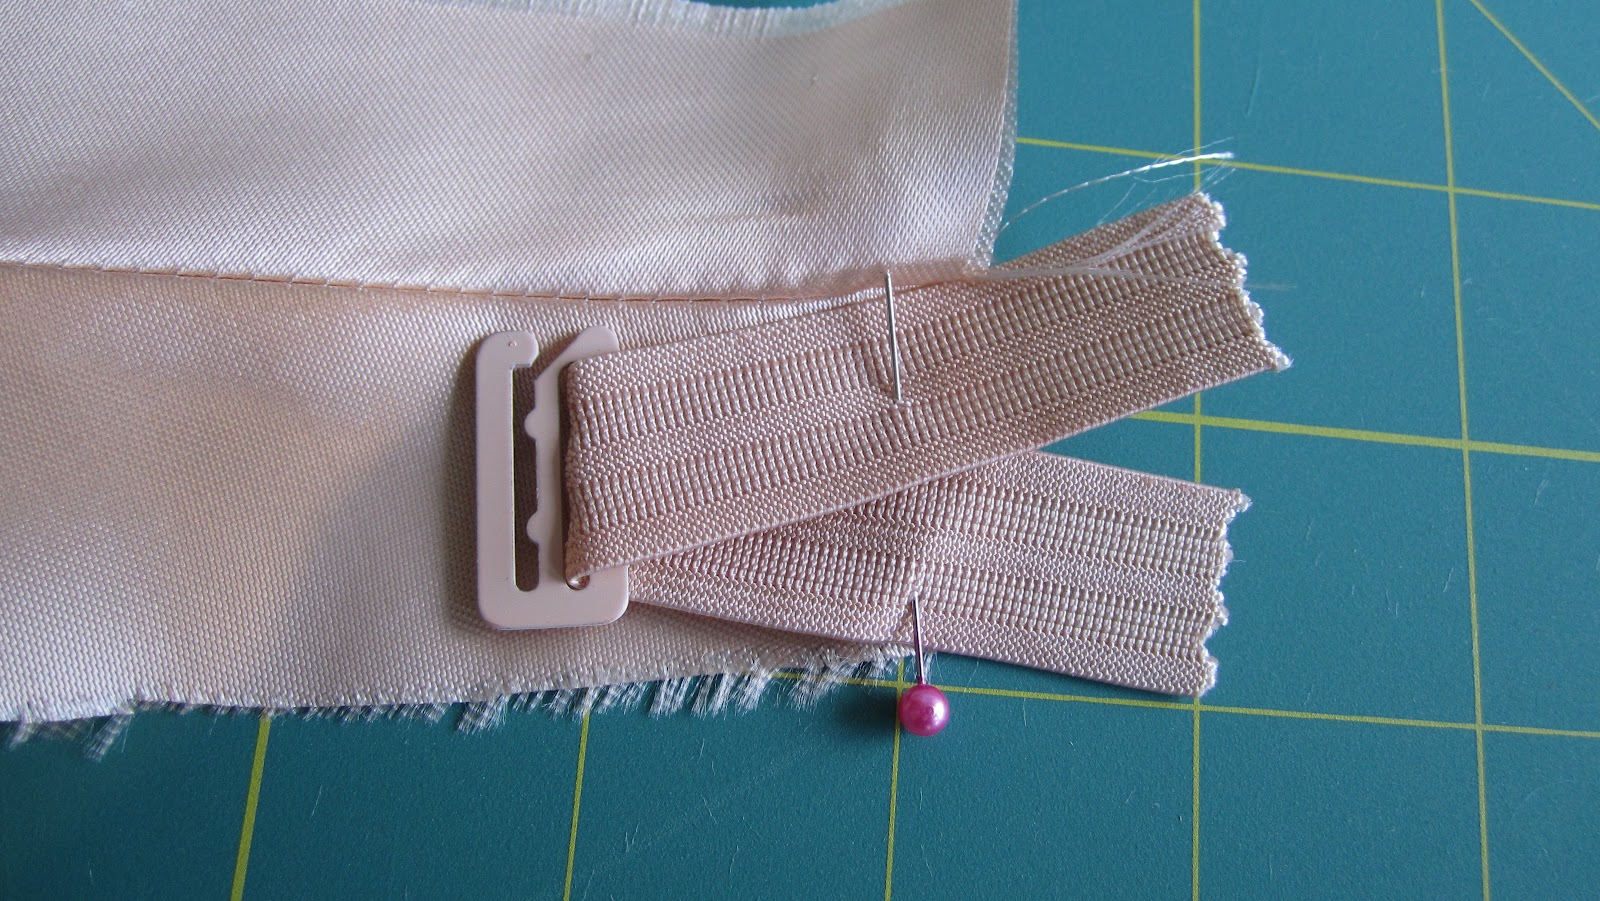
I have started by pressing my bra center back pieces open. First choose which side you want your bra hook end to go on, then lay that side Right sides out and open.
 |
| The left side of my bra back, right sides open. |
I have pinned my closure so that the hook is facing towards the side seam of the bra. (When I'm done, it will be facing the center back of the bra). If you're using the adjustable closure, pay attention which direction your hooks are facing.
 |

Now close your bra back so that the closure is folded between the right sides of the bra and lining, and stitch.
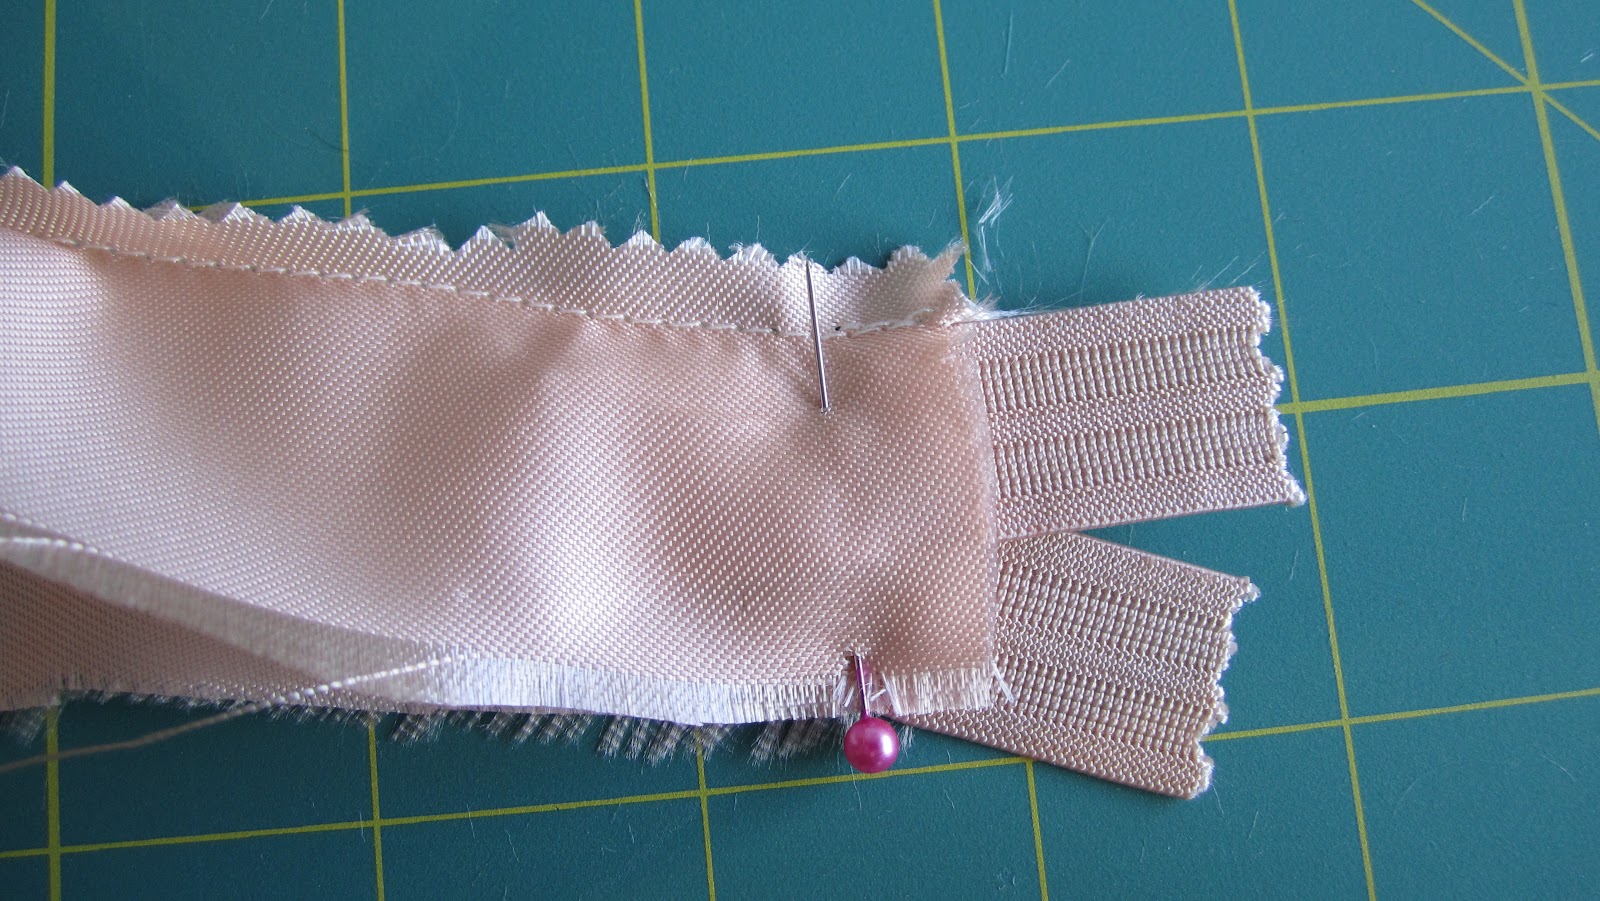
Then trim your excess closure if neccessary and turn the whole thing right side out. You may need to use a pin (or if you have scissors with a slightly rounded edge I find that works great!) to turn your corner.

If you plan on not binding your edges and are instead sewing your lining to the whole bra and turning it right sides out, you'll have an added seam allowance to the top of the bra here and you can go on to stitch the rest of your bra together at this point.
Now we have a neatly sewn closure with the ends tidily concealed. Next you can repeat this for the other end of the bra.

 |
| My bra back, top ready to be basted and bound. |
Now to get the bra top ready for binding simply pin the bra top right sides together, and starting at the center front and working your way out, baste the bra and lining together, 1/4" from the edge.

Voila! Now I'm ready to bind the top of my bra.

But I'll save that for next time. There's a Bowflex in the next room, judging me for ignoring it, and I need to go in and show it who's boss.
It's really looking beautiful, Anna! Love the closure.
ReplyDelete